Welcome to the new ShoutCast V2 Authhash help guide. If you are a new Centova Cast V3 broadcaster using the ShoutCast V2 software then you will need to follow these steps to get your station listed on ShoutCast. You will not even be able to listen to your stream until this is done so be sure to follow these steps. Now we are going to assume you already have your station up and broadcasting. If your station is not already broadcasting please do that before starting these steps. You can not request an Authhash if your station is not up and running. Best thing to do is upload a few songs into auto dj and start your station.
STEP 1
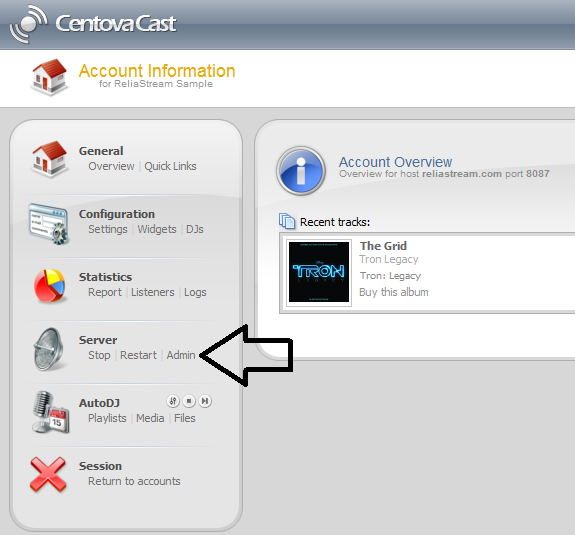
You will need to log into your 19jawebhosting Centova Cast V3 radio server. Once you are logged into your server you will want to locate the Admin link in the Server area. You will press Admin and this will open a new screen. See step 2.
STEP 2
Once you press the Admin link you will see a new screen that will look like the screen below. You will also notice under Available streams it says Stream #1. If your station is not already running that area will be blank and you will not be able to set up your Authhash. You can see our stream is in fact running. Now you will want to click on Administrator Login. See where our arrow is pointing. Upper right side of your screen.

STEP 3
Once you press the Administrator Login a new pop up window will open up. This is your ShoutCast DNAS login window. The username is always admin and the password is your Centova Cast V3 admin password. Make sure you are entering the admin password not the source password. Some members get this confused. Every Centova Cast V3 account has a source and admin password so it's easy to get them mixed up..

STEP 4
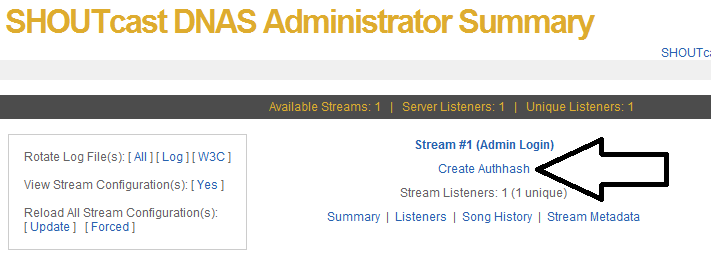
Once you are logged into your ShoutCast DNAS you should see the Create Authhash link. You will want to click on this link to start the create authhash process.
STEP 5
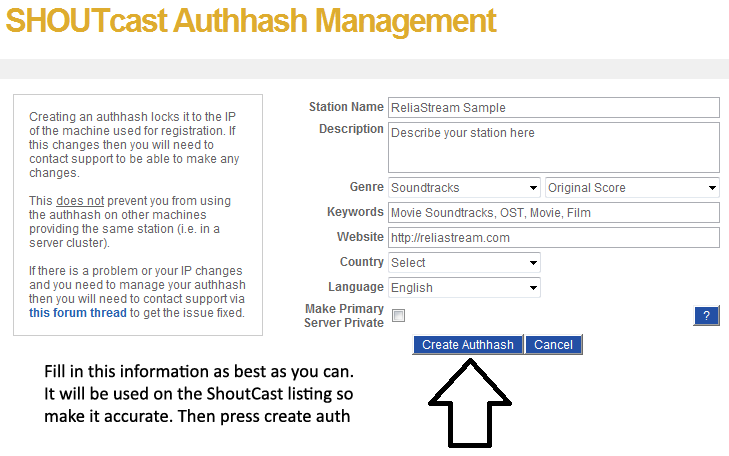
Now you are going to fill out all the needed information. BE SURE to fill this information out as best as you can. Try to think of the best description for your station. Enter the best possible keywords and other information. ShoutCast uses this information when listing your station so it is very important. When you are done filling this out press the Create Authhash button. See below.
STEP 6
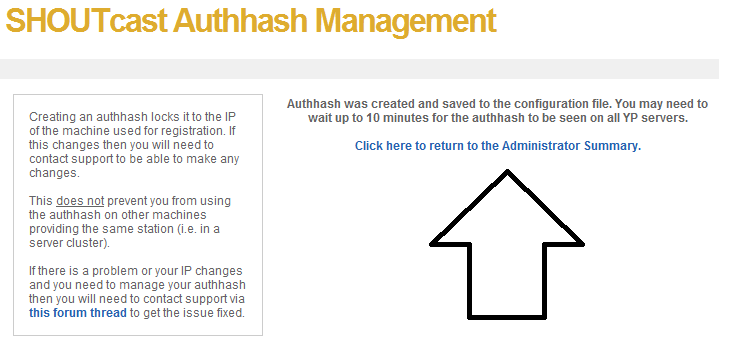
Once you have pressed blue Create Authhash button you should see a screen like the one below. Keep in mind it can take a few minutes or a little longer for this to start working as it states on the screen. You can now return to the admin summary area so click on the Admin Summary link.
STEP 7
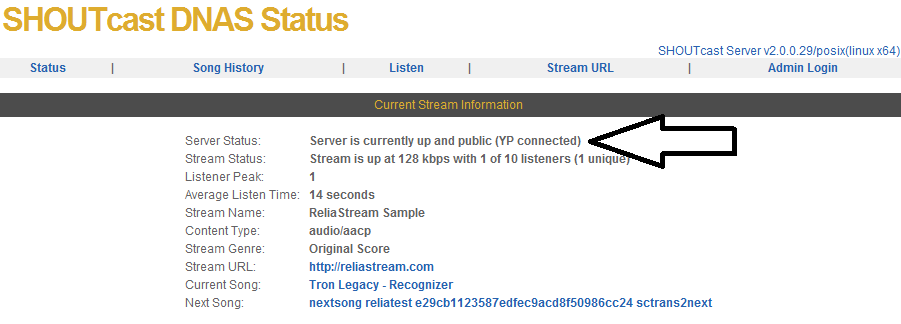
You will be taken back to your ShoutCast DNAS status page. On this page you can see the status of your station and other information. The picture below shows our sample station is up and running and it's public. Now if this says your station is private and you want it to be public you will have to check your authhash settings. If you are 100% sure you did not check private station in the ShoutCast DNAS area then you will have to go back to your Centova Cast V3 server. See step 8.
STEP 8
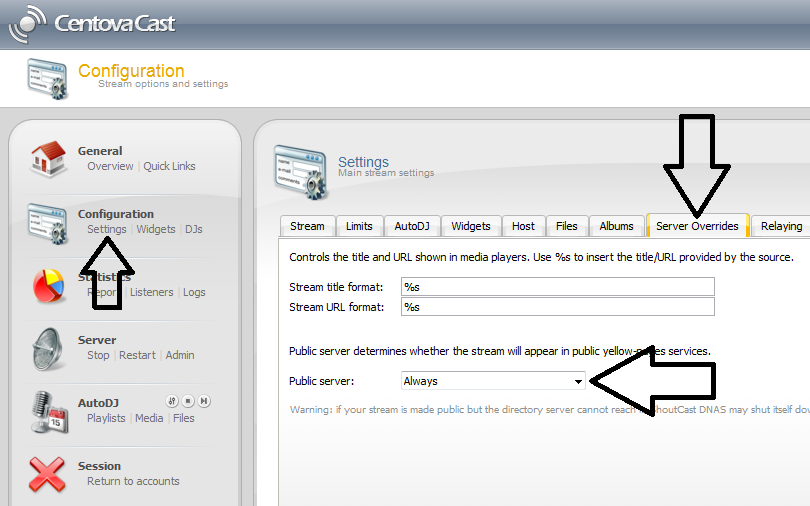
Only do step 8 if your station is showing private on your ShoutCast DNAS status page. If your station is up and public then DO NOT do this step. If your station is not set to private on the ShoutCast authhash settings but is still showing private then you will need to log back into your ReliaStream Centova Cast V3 server. Press the Settings link in the Configuration area (left side). Now you will want to press the Server Overrides tab. Then look at your Public Server section. You will want to set that to ALWAYS and press the Update button below (not shown on this pic). Once that is done you will want to press Restart in the Server section. This will make sure your settings are fully updated. Once your station is up and running again go back into your ShoutCast DNAS status area. Click on Stream #1 and see if your station is public. If not press Update Authhash and it will refresh things. That should take care of you getting your ShoutCast V2 Authhash.
