Setup
Once you click to open SAM on your computer, your going to be looking at desktop (A).
These boxes can be moved around just by clicking and dragging. Made bigger / smaller just like normal windows on your computer.
We'll look at how to add / remove in the next few pics.
![]()
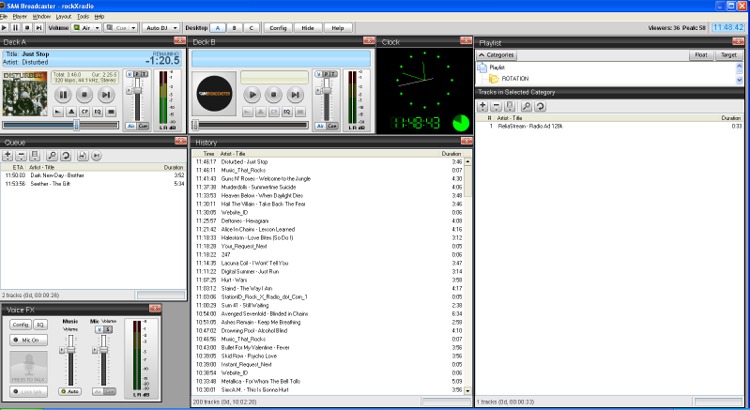
To add / remove windows from your desktop (A) or (B), click 'Window' at the top left and add/remove what you think is necessary.
I have only what i need, however what you need may be different.
![]()

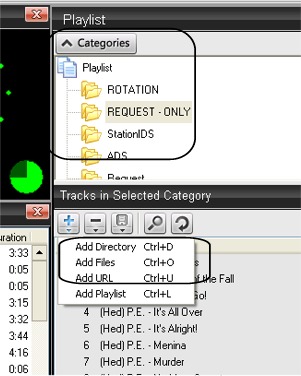
One thing you'll need? Music! :)
The default playlist will say 'tracks'. You can keep this or create your own as I have done below.
Highlight the playlist, then click the plus sign. If you have a full directory of mp3's etc.. on your hard drive this may be easier. Otherwise
you can add each song or many songs from one folder by using 'add files'.
![]()
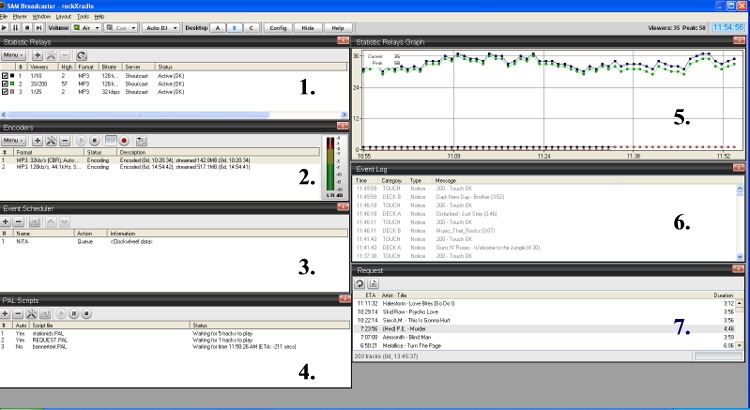
Now we move to Desktop (B). I do not use desktop (C), however if you need more windows this is an option.
1. Static Relays::: This gives you your basic listener numbers. How many are listening, available slots etc...
2. Encoders::: This is the main setup telling SAM where to connect to.
3. Event Scheduler::: I use this to program my pre-recoreded syndicated radio shows. You tell SAM what and when to add files to the queue.
4. PAL Scripts::: This is a nice feature to add to your station. eg. One script to add a station ID every 5 songs.
5. Listener graph::: This graph are all your relays from no.1
6. Event Log::: Good place to look if your experiencing any issues. A number of error messages will appear here.
7. Requests::: SAM has the ability to take automated requests from your website. This is a list of those requests that SAM has taken.
![]()
This ends the Setup section.
You should has an idea of what you would like on your desktops and adding music to SAM Broadcaster.