Encoder(s)
Make sure you have all your settings that were sent to you from 19jawebhosting.
Username, Password, Server IP Adress and Port number
Firstly, click on the plus sign on your encoder window. For me this is on desktop (B).
Should be there by default
![]()

You are now presented with a number of options. This window may not look the same depending on the version os SAM.
Everyone should have MP3 (Lame_ENC). Select this encoder and click OK
![]()

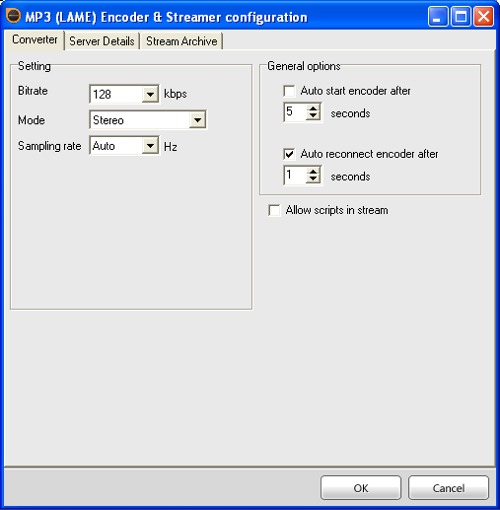
Converter
Bitrate::: Select the appropriate kbps as what you purchased.
Mode::: Stereo
Sampling rate::: I have mine selected to auto. However if all your mp3's are 44.1 khz then you can select this option.
General options::: This is a personal preference on how you want the encoders to start.
I only use auto reconnect encoder, just incase it does disconnect.
Choose what is the better option for you.
![]()
Server Details
Server Type::: Shoutcast
SHOUTcast::: v1
centova cast is v1. If you have WHMsonic it will be v2. However this guide will not cover WHMsonic
You should have received an email showing Server IP, Server Port and Password. Look for that info and enter into the appropriate fields.
Station Name::: Station Name
Genre::: Rock, Hard Rock, Metal ??? etc...
Website URL::: Station website address
AIM, ICQ#, IRC Channel::: Can all be N/A or if you have one of these accounts it can be entered.
Check::: List on public station listing
Check::: Enable title streaming
Caption template and URL Append template you do not need to adjust
![]()

Once complete click ok and your encoder should show in the encoder box.
Tip::: Turn off the centova auto dj as this will help with streaming live. Once that is complete restart your Centova server,
start your encoders in SAM and on desktop (A) click play on Deck A or B.
You should now be broadcasting LIVE!!!